Do not follow this guide if you have a Z1+ WorkBee. You are already on the latest version.
Before proceeding you must backup your system settings.
| Image |
Instructions |
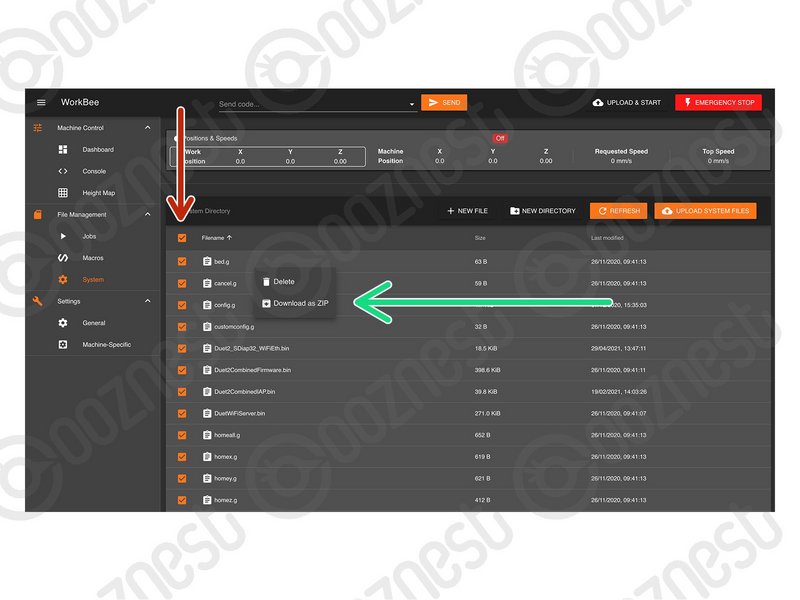 |
- Select All.
- Right Click on any file, and press 'Download as ZIP'
- You must unselect any folders (Sub-directories) for 'Download as ZIP' to appear.
- Inside File Management > System, Right Click and Delete the file named 'DuetWiFiServer.bin'
- You may not have the file 'DuetWiFiServer.bin' in your System folder. If not that is ok, nothing to delete.
|
We must make sure we know the IP Address the WorkBee is connected under.
| Image |
Instructions |
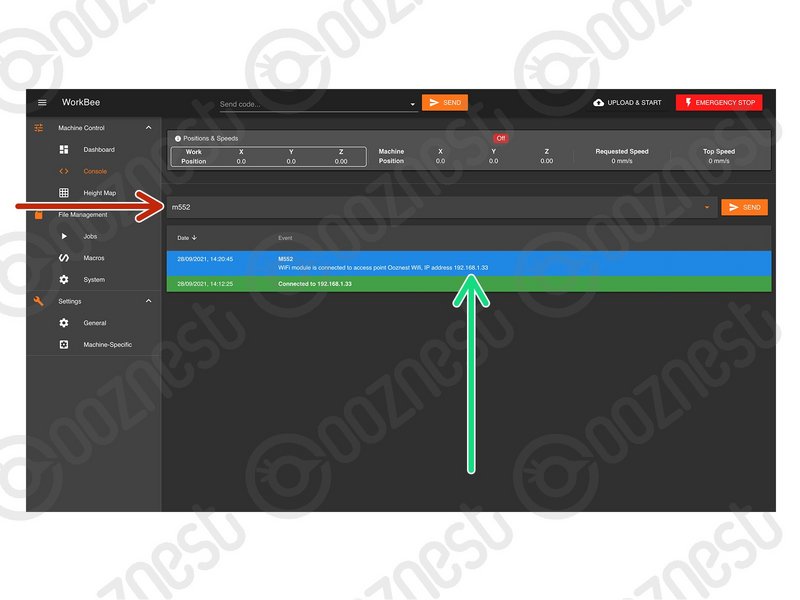 |
- Go to Machine Control > Console.
- Input the command: M552 then press 'Send'
- It will return the IP Address. Note it down.
|
| Image |
Instructions |
 |
|
| Image |
Instructions |
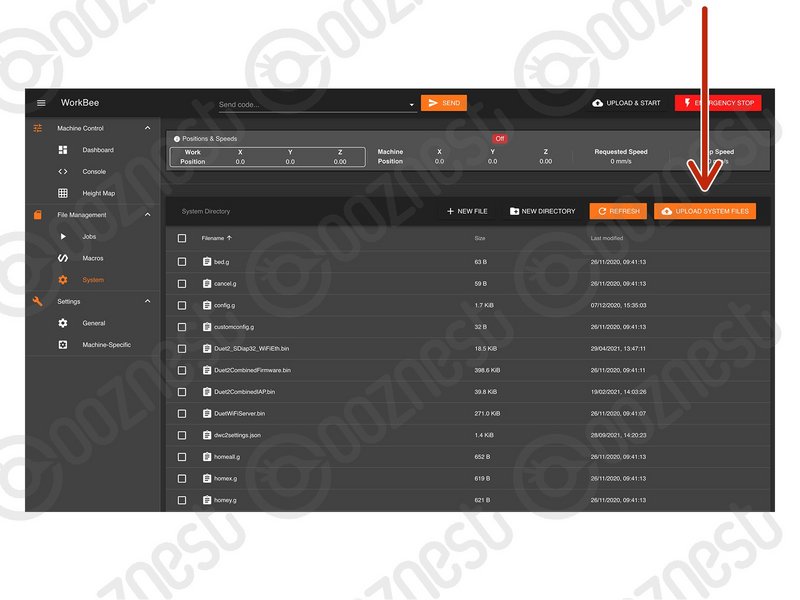 |
- Go to File Management > System and press 'Upload System Files'
- Navigate to where you extracted the download.
- Select Step4.zip
- Wait until the upload is complete and then press 'Close'
|
| Image |
Instructions |
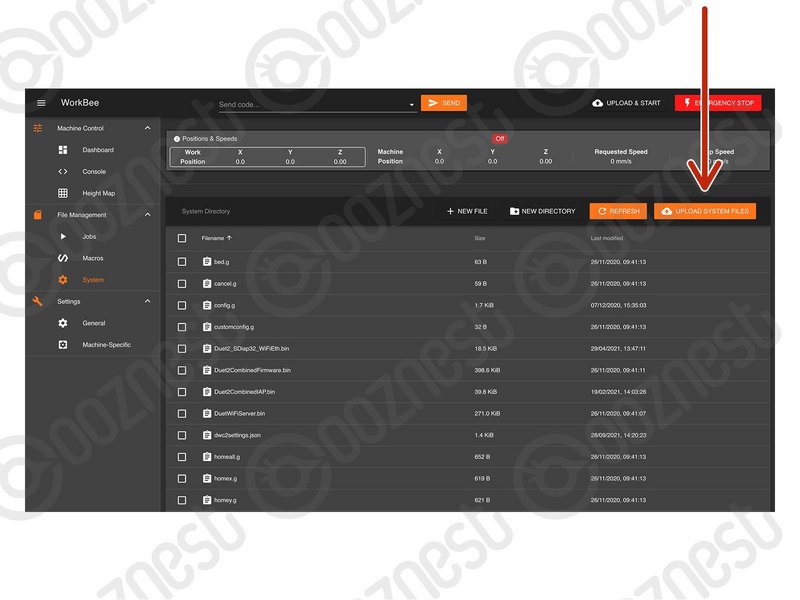 |
- Go to File Management > System and press 'Upload System Files'
- Navigate to where you extracted the download.
|
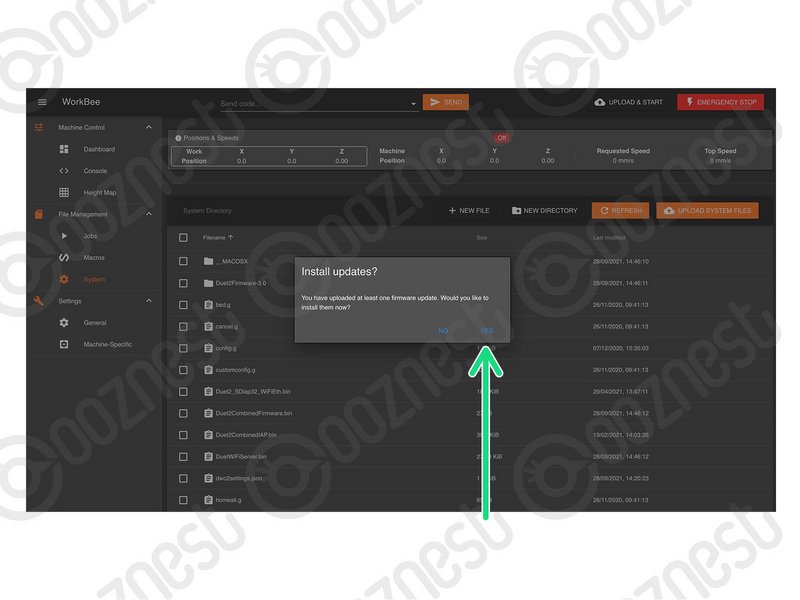 |
- Select Step5.zip
- Confirm the installation.
|
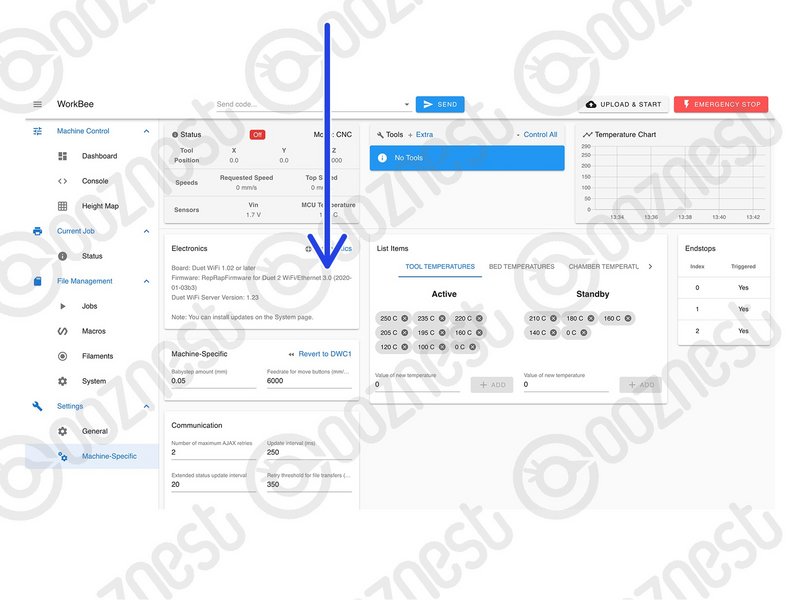 |
- The WorkBee will disconnect, be patient and wait until it reconnects.
- Go To System > Machine-Specific. It should now say 3.0.
- If it does not say 3.0. Repeat this Step. If it still does not change to 3.0 Contact Us
|
| Image |
Instructions |
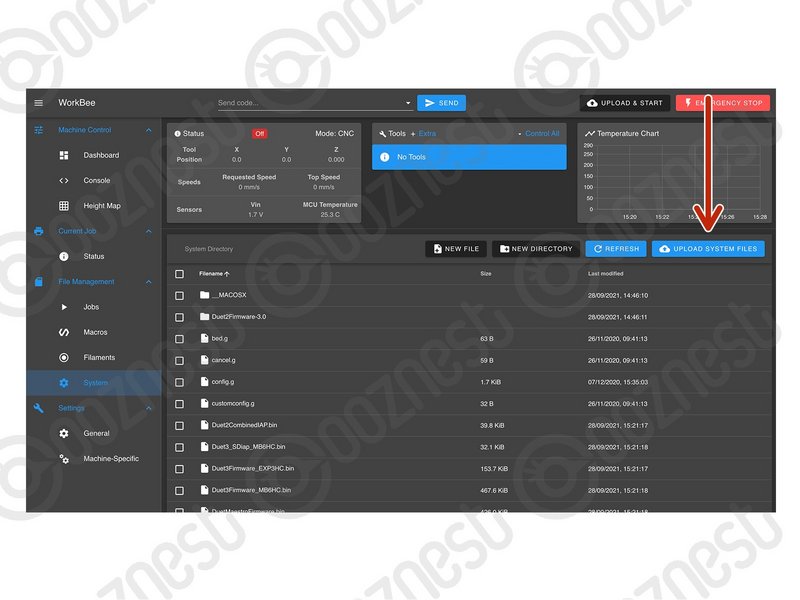 |
- Go to File Management > System and press 'Upload System Files'
- Navigate to where you extracted the download.
|
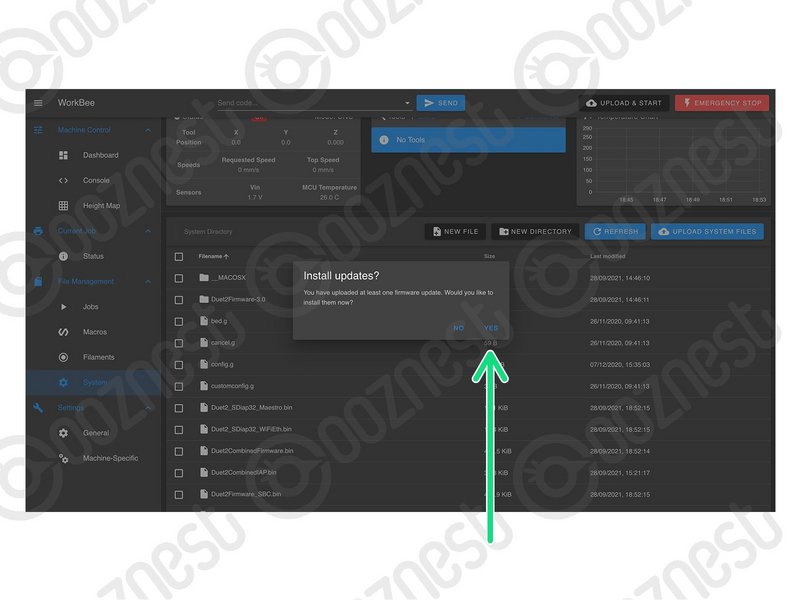 |
- Select Step6.zip
- Confirm the installation. Wait until it reconnects.
|
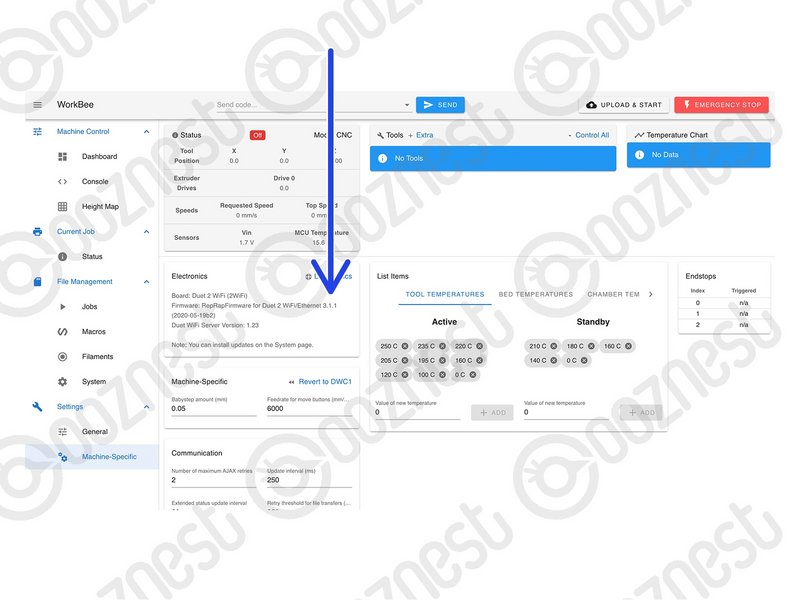 |
- Go To System > Machine-Specific. It should now say 3.1.1.
|
If it does not say 3.1.1. Repeat this Step. If it still does not change to 3.1.1 Contact Us
| Image |
Instructions |
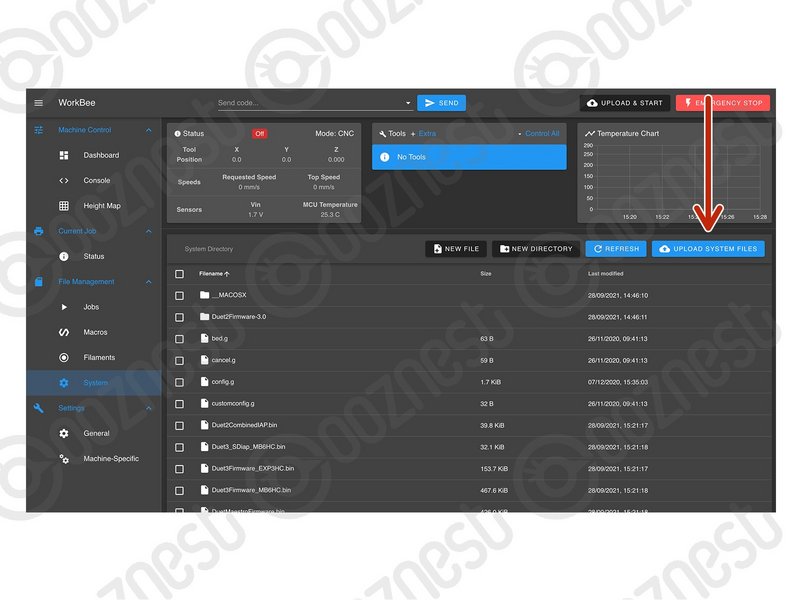 |
- Go to File Management > System and press 'Upload System Files'
- Navigate to where you extracted the download.
|
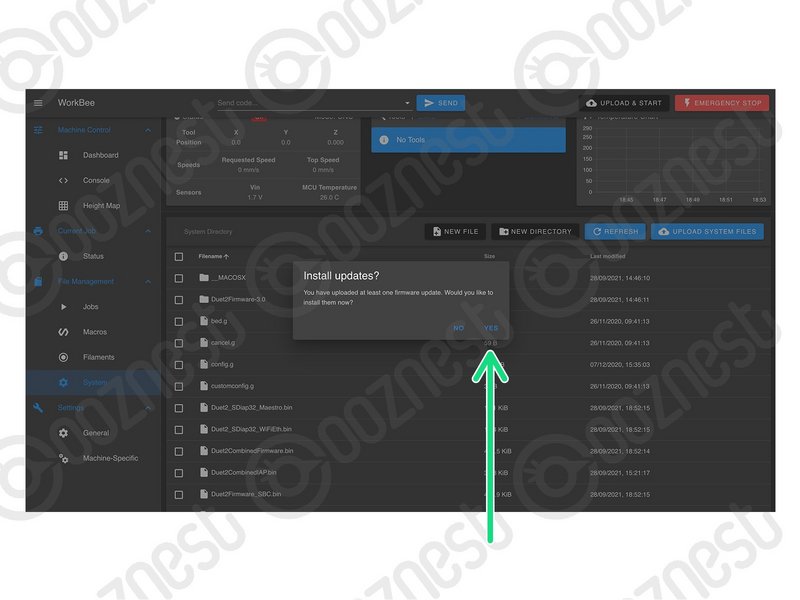 |
- Select Step7.zip
- Confirm the installation. Wait until it reconnects.
|
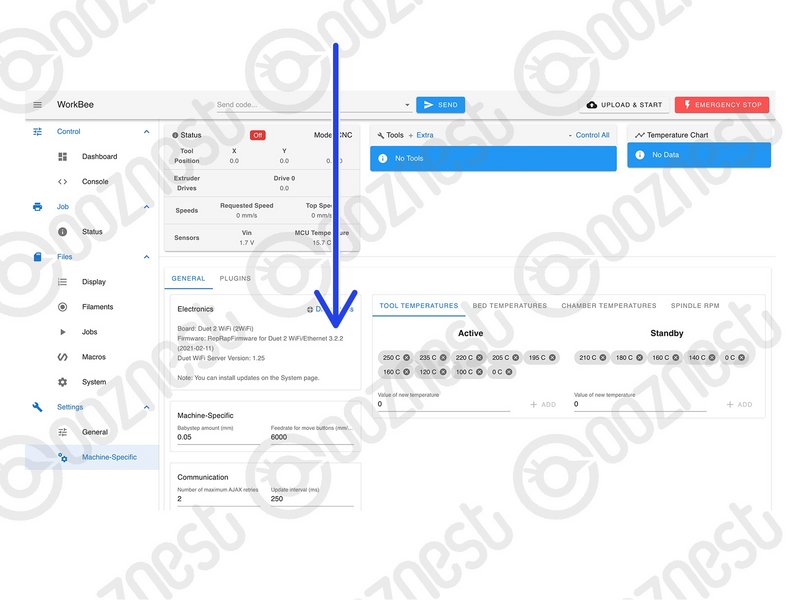 |
- Go To System > Machine-Specific. It should now say 3.2.2.
|
If it does not say 3.2.2. Repeat this Step. If it still does not change to 3.2.2 Contact Us
| Image |
Instructions |
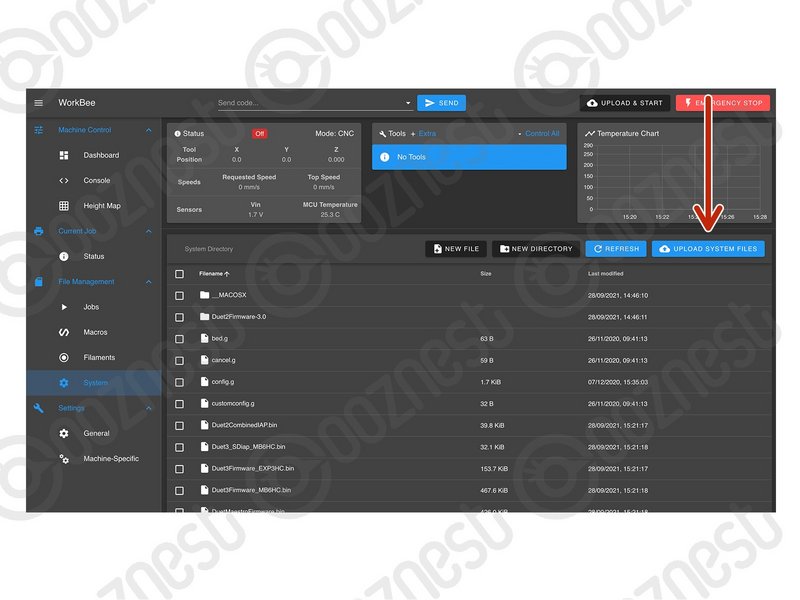 |
- Go to File Management > System and press 'Upload System Files'
- Navigate to where you extracted the download.
|
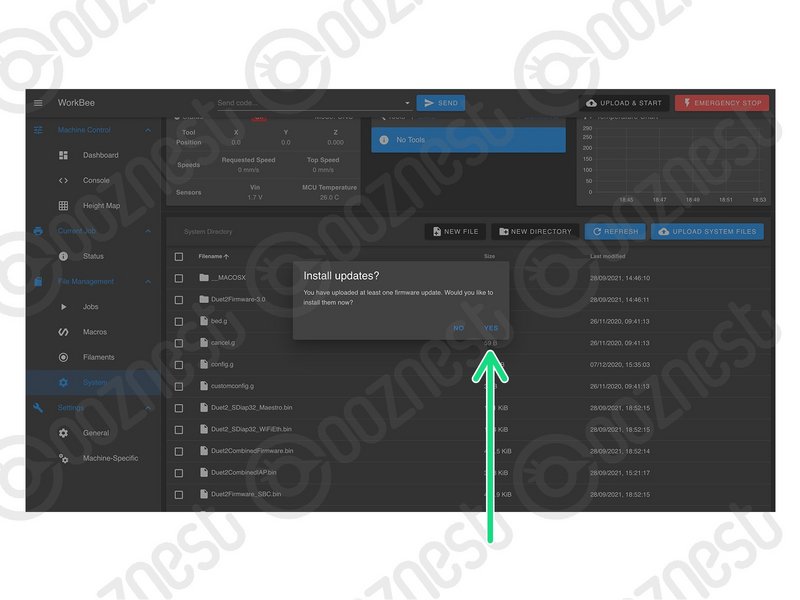 |
- Select Step8.zip
- Confirm the installation. Wait until it reconnects.
|
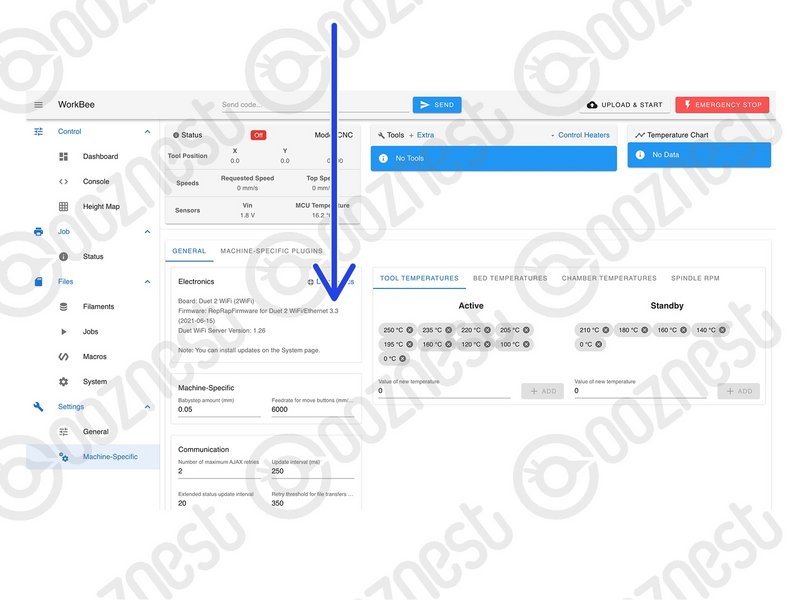 |
- Go To System > Machine-Specific. It should now say 3.3.
|
If it does not say 3.3. Repeat this Step. If it still does not change to 3.3 Contact Us
| Image |
Instructions |
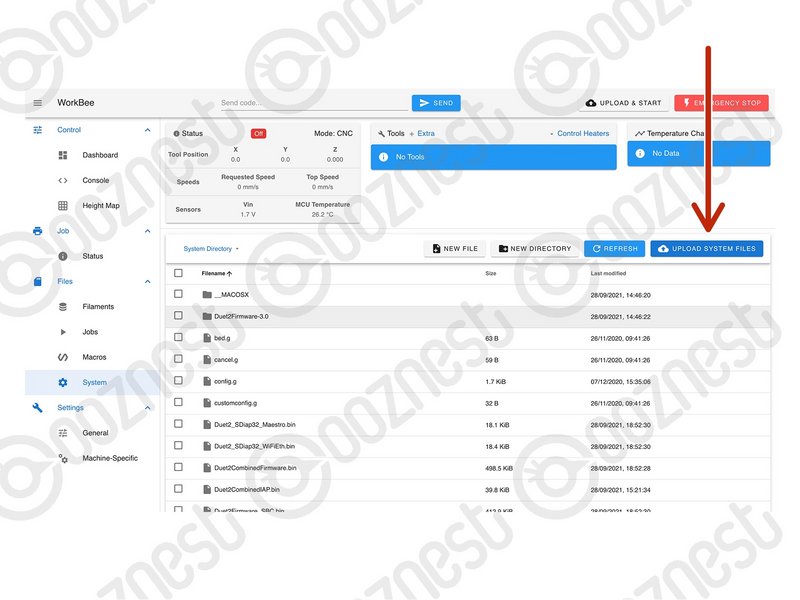 |
- We can now install WorkBee Control
- Go to File Management > System.
- Press 'Upload System Files'
- Navigate to where you extracted the download.
- Select Step9.zip and Confirm the installation.
|
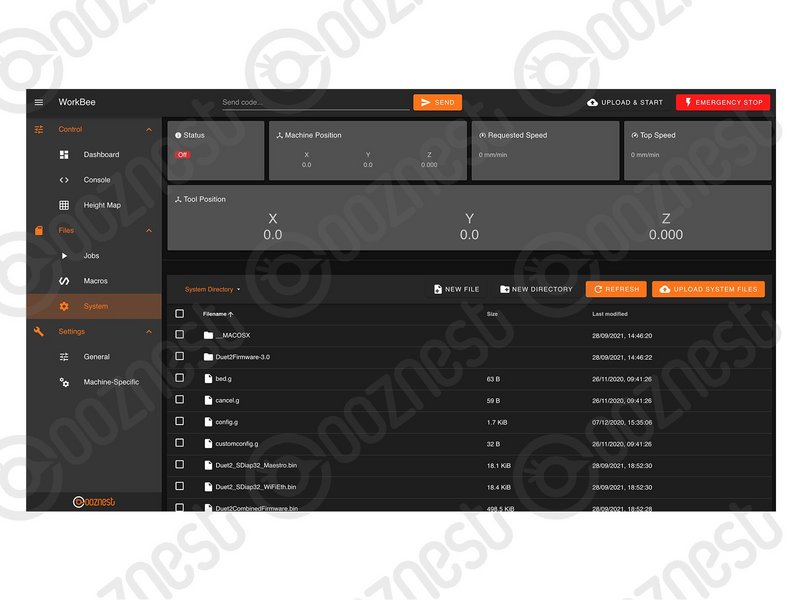 |
- It should now look like this image. If it does not, refresh your Browser.
|
If you have the Wifi version, skip this step.
If the IP Address found in Step 2 is 192.168.251.2 skip this step.
If the IP Address found in Step 2 is different from 192.168.251.2 then complete this step.
| Image |
Instructions |
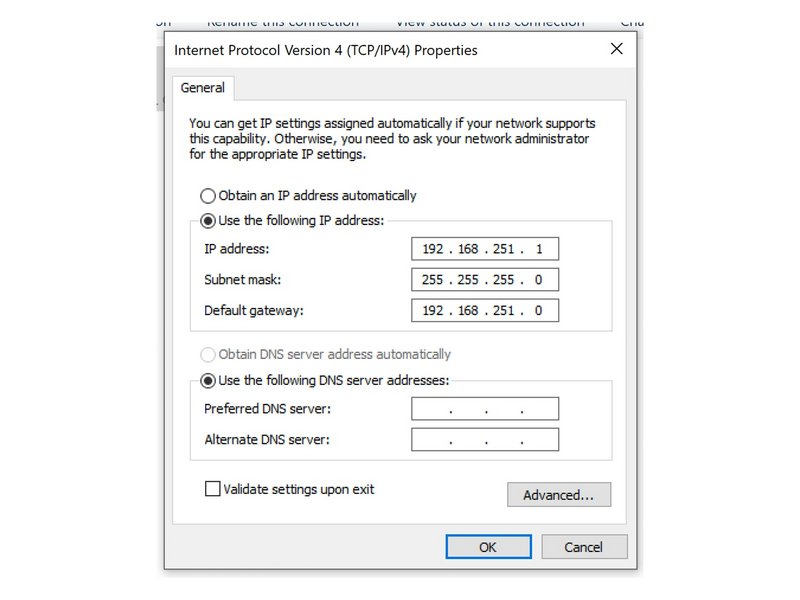 |
- You can either configure your Ethernet Port as per Image 1. If not follow the points below.
|
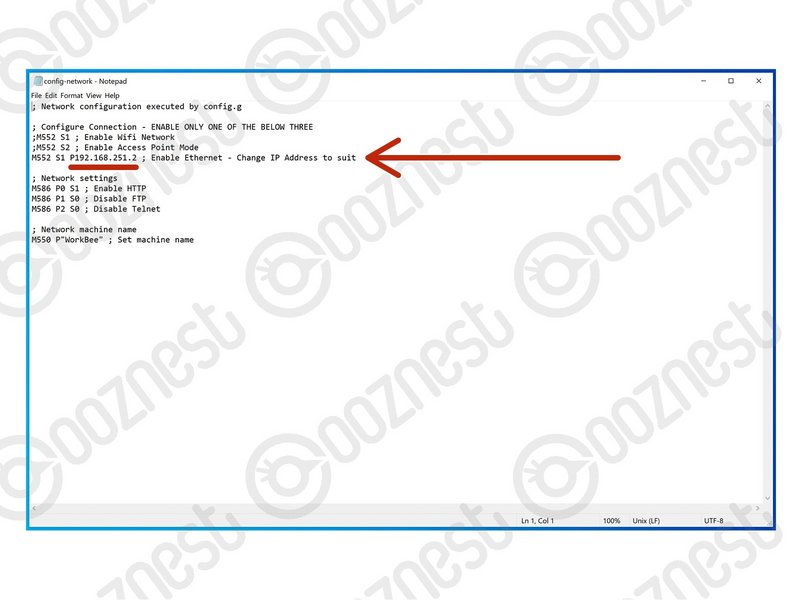 |
- On your computer, navigate to the extracted files, then to Step 11 > Ethernet.
- Open config-network.g with notepad.
- Change the IP Address to that found in Step 2.
- Save and close.
|
Make sure you follow the steps below exactly. Upload the files inside the folder matching your connection method. Do not upload the folders
| Image |
Instructions |
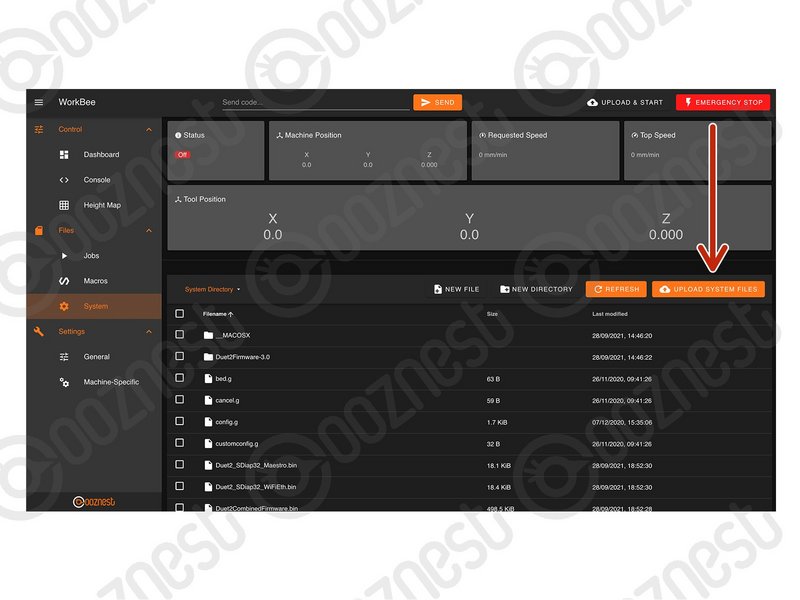 |
- Go to Files > System and press 'Upload System Files'
- Navigate to where you extracted the download.
|
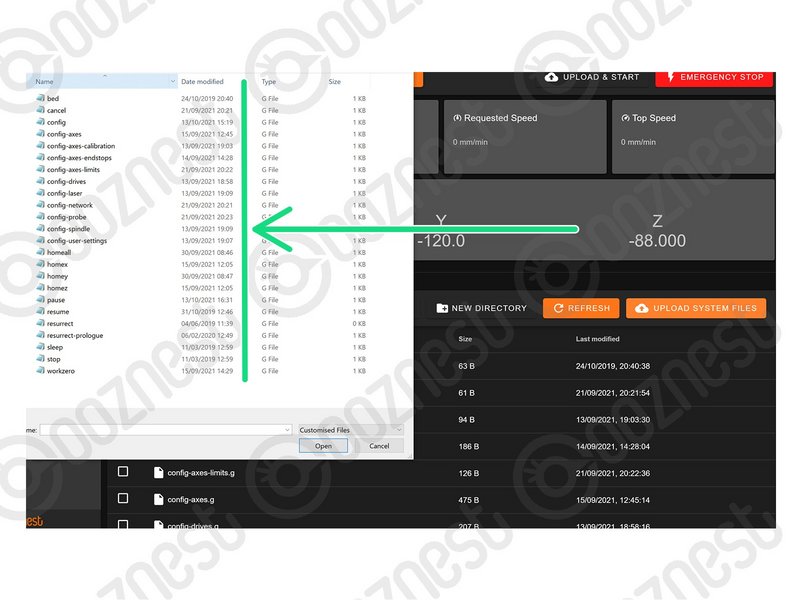 |
- Double-click on the 'Step 11' folder.
- Double-click on the folder matching your connection method.
- Select & upload all the files inside.
|
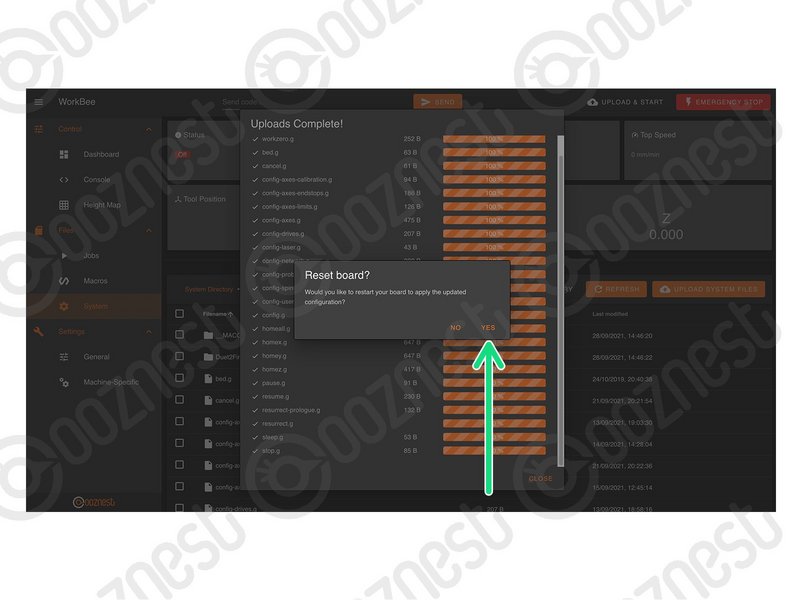 |
- Confirm the board restart.
- If it does not restart press the software emergency stop in the top right corner.
|
If your machine is all Screw Drive skip this step.
If your machine is all Belt Drive complete the point below.
| Image |
Instructions |
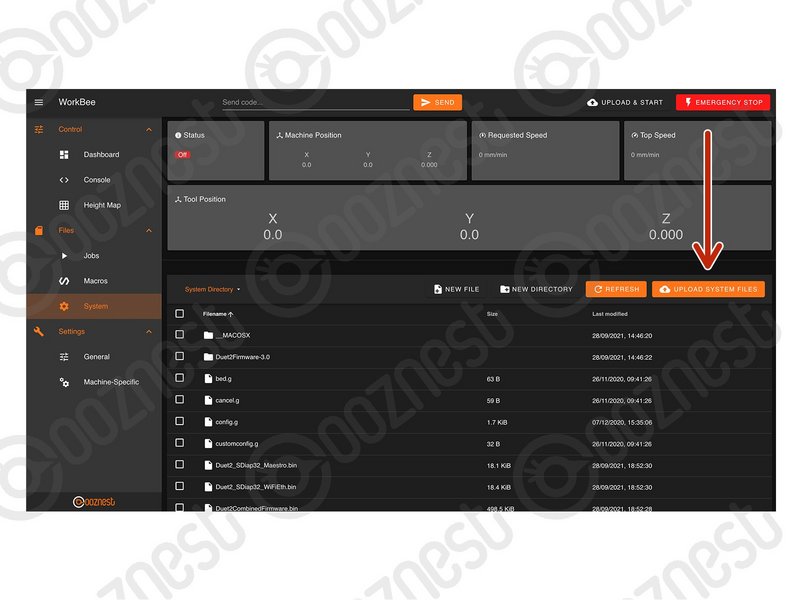 |
- Upload all the files inside 'Step12' > 'Belt-Drive'. Do Not Upload the folder itself, just what is inside.
- If your machine is all Belt & Screw Drive complete the point below.
- Upload all the files inside 'Step12' > 'Belt-&-Screw-Drive'. Do Not Upload the folder itself, just what is inside.
|
| Image |
Instructions |
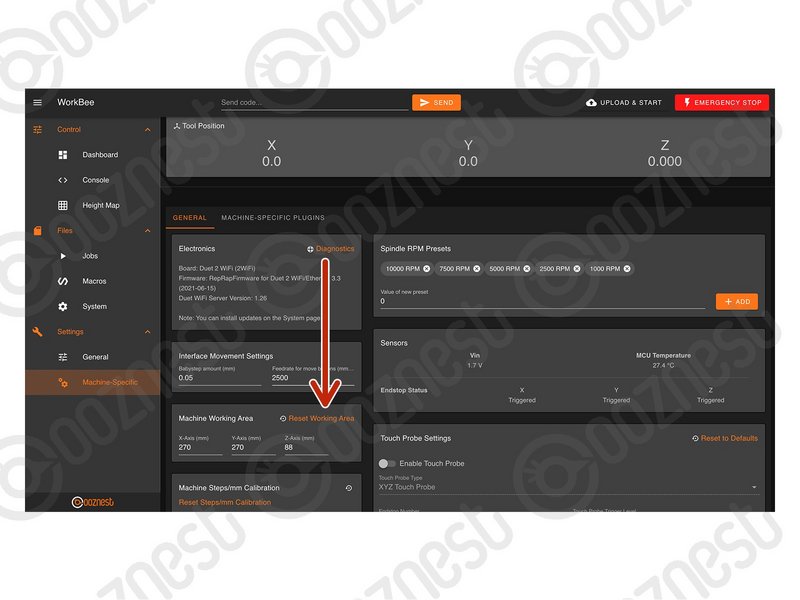 |
- Go to Settings > Machine Specific
- Under the Panel called 'Machine Working Area' press 'Reset Working Area'
|
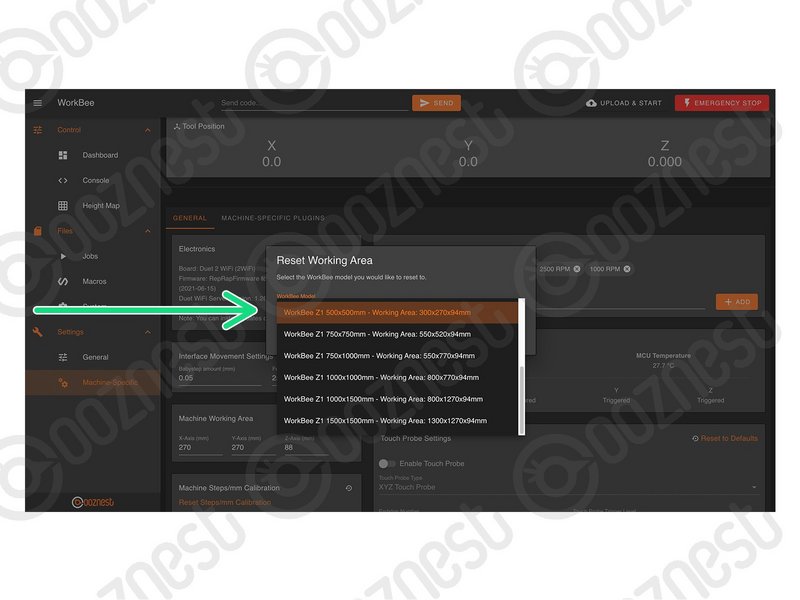 |
- Under the 'WorkBee Model' dropdown select your model and machine size.
- If your WorkBee was received before 27/09/2021, then it is a Z1.
- Confirm by pressing 'Yes'
- The machine size is now configured. No restart required.
|
| Image |
Instructions |
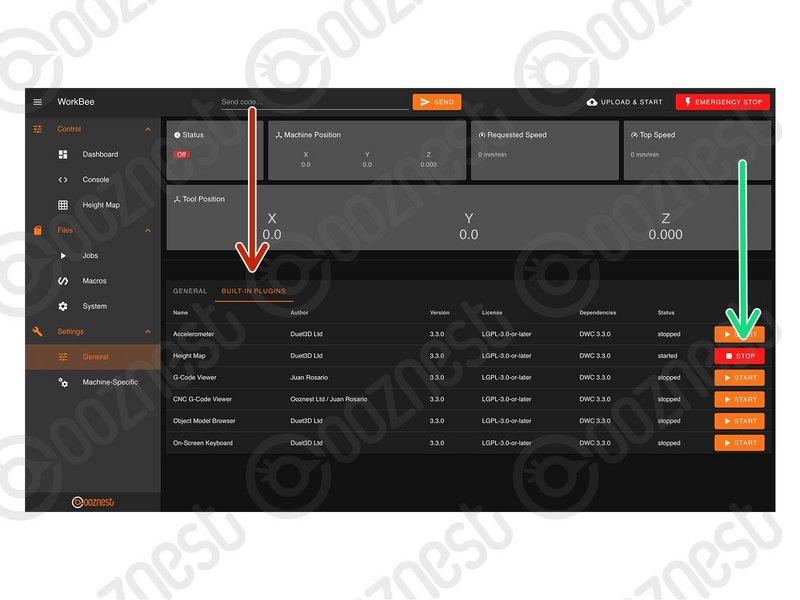 |
- Go to Settings > General > Built-In Plugins
- If you don't use the 'Height Map' plugin, press 'Stop'
- Refresh your browser.
|
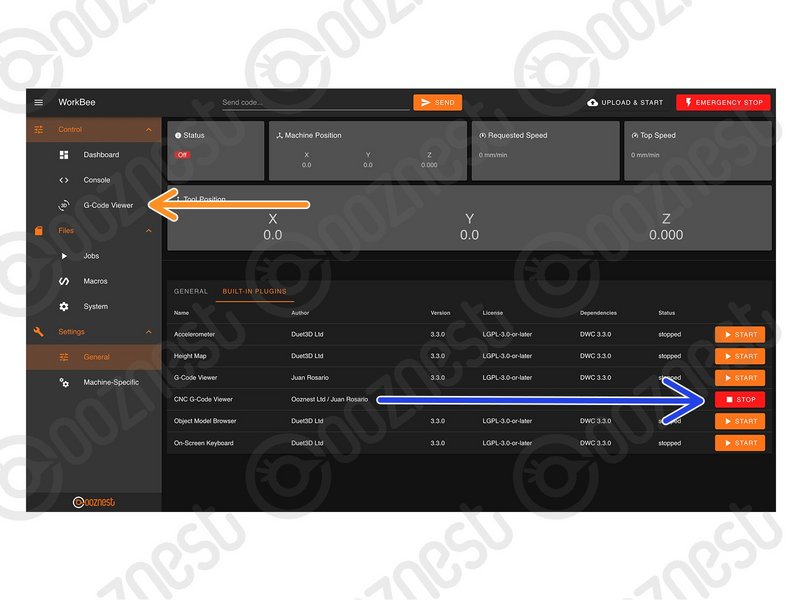 |
- Go back to Settings > General > Built-In Plugins
- Start 'CNC G-Code Viewer' plugin.
- A G-Code Viewer will now show in the Navigation Menu.
- If you have used previous versions of the Duet G-Code Viewer, you will need to clear your browser cache for it to look correct.
|
| Image |
Instructions |
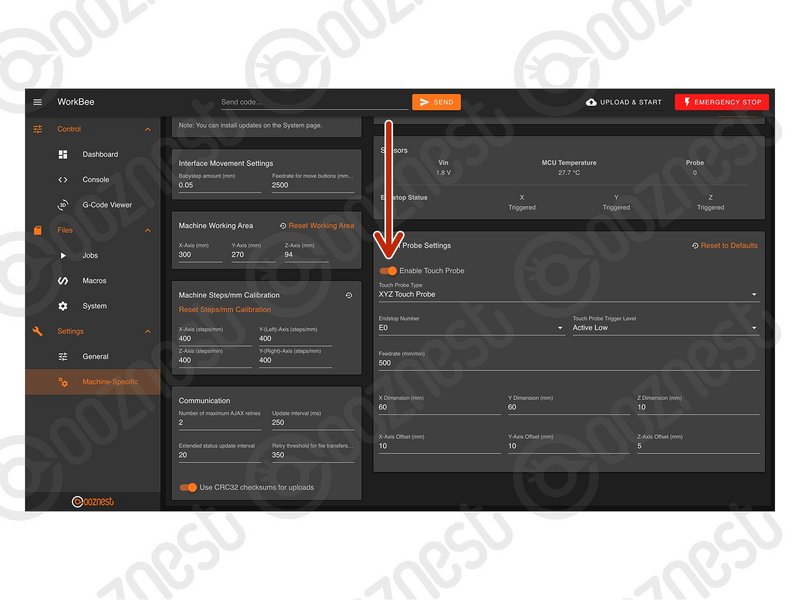 |
- If you have our WorkBee Touch Probe, go to Settings > Machine Specific
- Under the Panel called 'Touch Probe Settings' press 'Enable Touch Probe'
|
| Image |
Instructions |
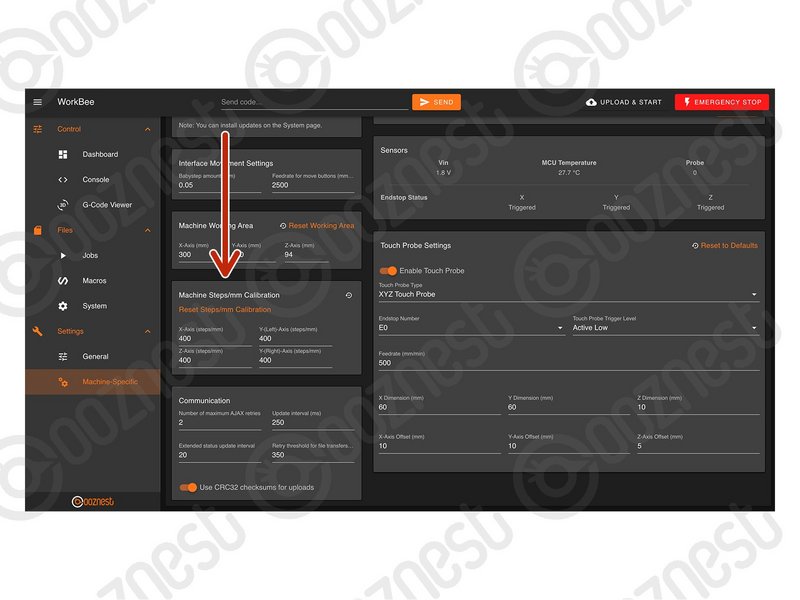 |
- Custom Steps/mm Calibration can be entered inside Settings > Machine Specific
- Under the Panel called 'Machine Steps/mm Calibration'
- The two Y-Axis Lead Screws can now be calibrated individually.
|
| Image |
Instructions |
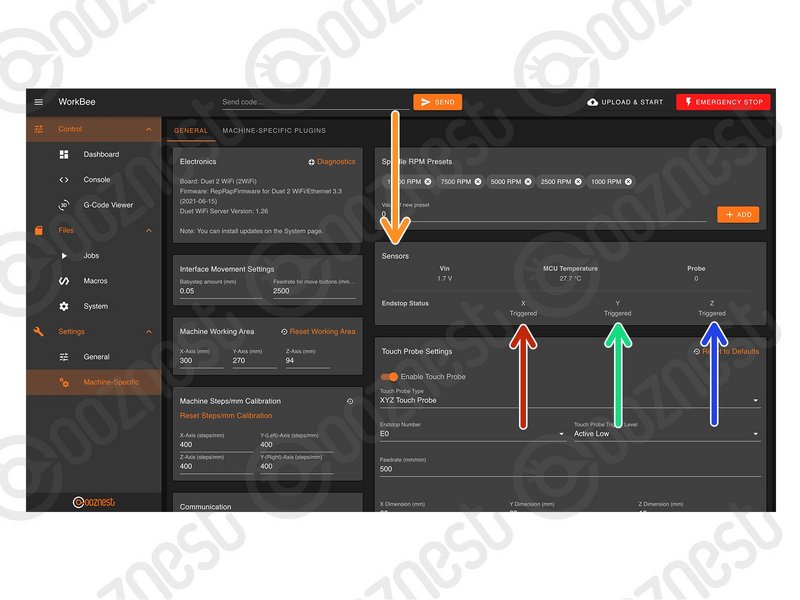 |
- In Settings > Machine Specific, under the Panel called 'Sensors' we can test the Limit Switches.
- Activate the X-Axis limit switch with your finger and hold.
- The Endstop Status should change to 'Triggered'
- It is normal for there to be a delay between pressing the limit switch and the status being updated. Please do not be concerned, the board will stop the motor instantaneously.
- Repeat this procedure for the Y-Axis Limit Switch.
- Repeat this procedure for the Z-Axis Limit Switch.
- If any behave the opposite way round, follow this guide to invert them How To Invert Limit Switches
|
| Image |
Instructions |
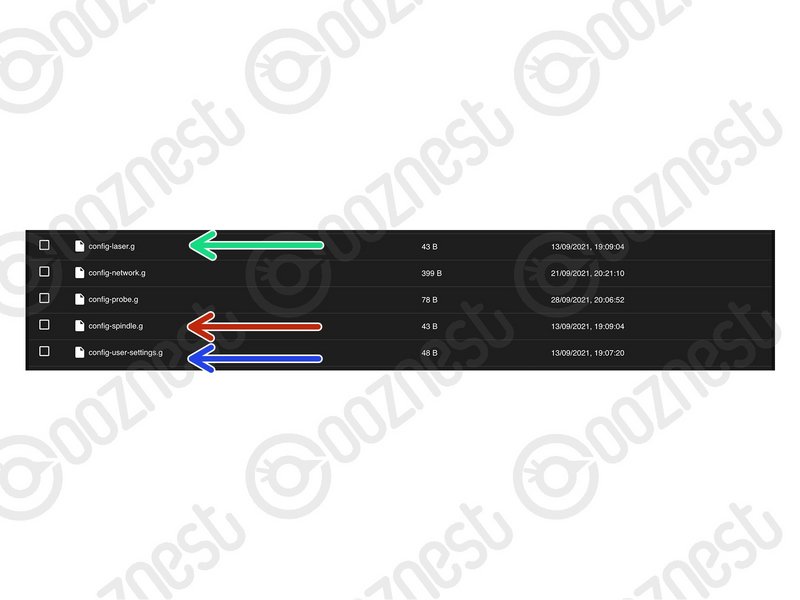 |
- Under File Management > System. Spindle Settings go in 'config-spindle.g'
- Laser Settings go in 'config-laser.g'
- Please note by default the machine will boot into CNC Mode.
- Upload these two Macros to switch into Laser Mode and Vice Versa. These will show on the Dashboard and can be used to switch between CNC Mode and Laser Mode.
- Other custom settings go in 'config-user-settings.g'
- The old customconfig.g file can be deleted.
- Remember after editing any of the files above, press the software emergency stop in the top right corner.
|
| Image |
Instructions |
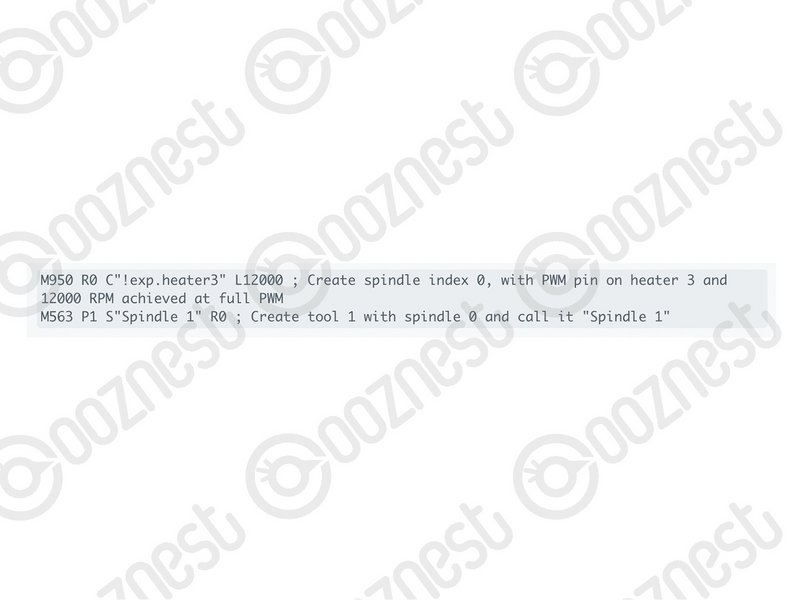 |
- 3.3.0 Firmware uses GPIO Names (General-Purpose Input/Output) rather than pin numbers.
- Any custom settings that use pin numbers, will need changing to pin names
- More info on the changes can be found on Duet's Dozuki
- For any custom Spindle/Laser or other settings, you will need to convert the commands.
- For a Spindle you would use M950 with M563. See Image 1 for an example.
|
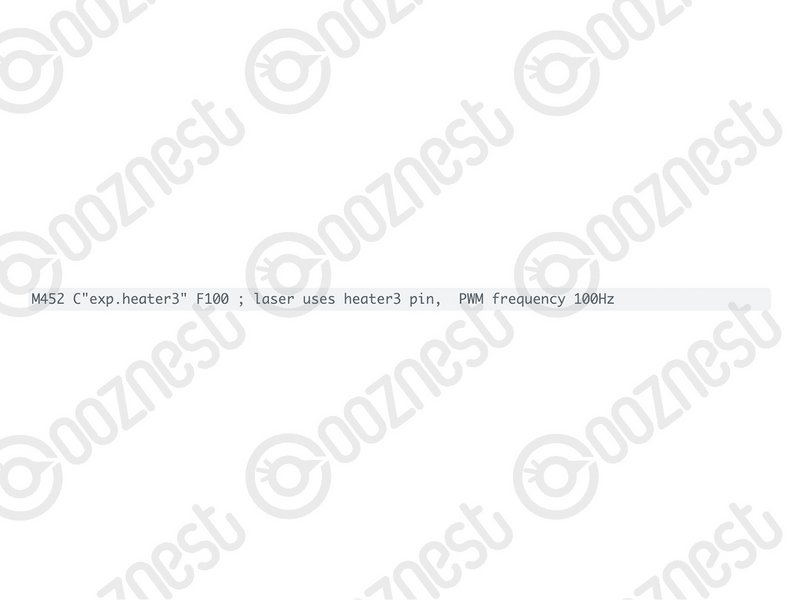 |
- For a Laser you would use M452, but use the Pin Name, instead of the Pin Number. See Image 2 for an example. For an OptLaser 6W wired as their guide the C Parameter would be: C"!exp.heater3"
- If you are unsure about any of the above please Contact Us.
- We have made all the required changes for our standard operation of the machine.
|