Use the Settings tab to view and change the controller's grblHAL configuration, back up or restore that configuration, and open Ooznest Control's setup tools.

Make changes only while the machine is stopped. Take a backup before changing the machine configuration, running the Configuration Wizard or applying calibration. Screenshot values are examples, not recommended settings for your machine.
| Instructions |
Preview |
- Connect to the controller, then open Settings.
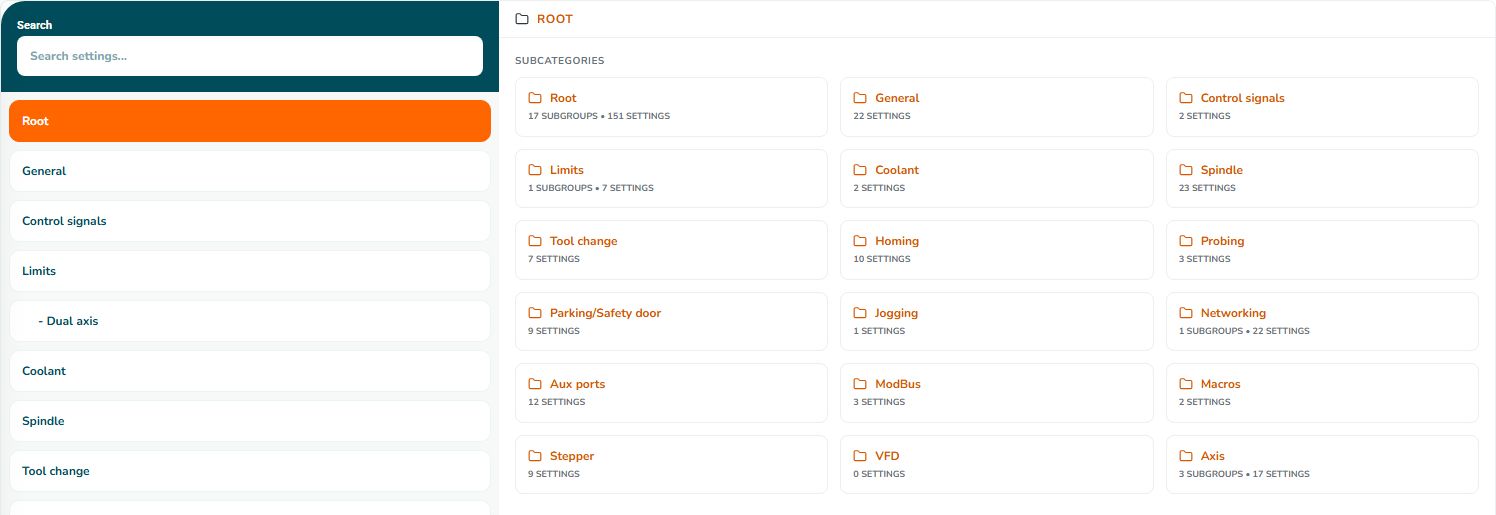
- Choose a category from the left-hand list or the category cards. For example, Axis contains the individual X, Y and Z axis groups.
- Root returns to the top-level categories.
- The available categories and settings depend on the connected controller's firmware and installed features.
|
 |
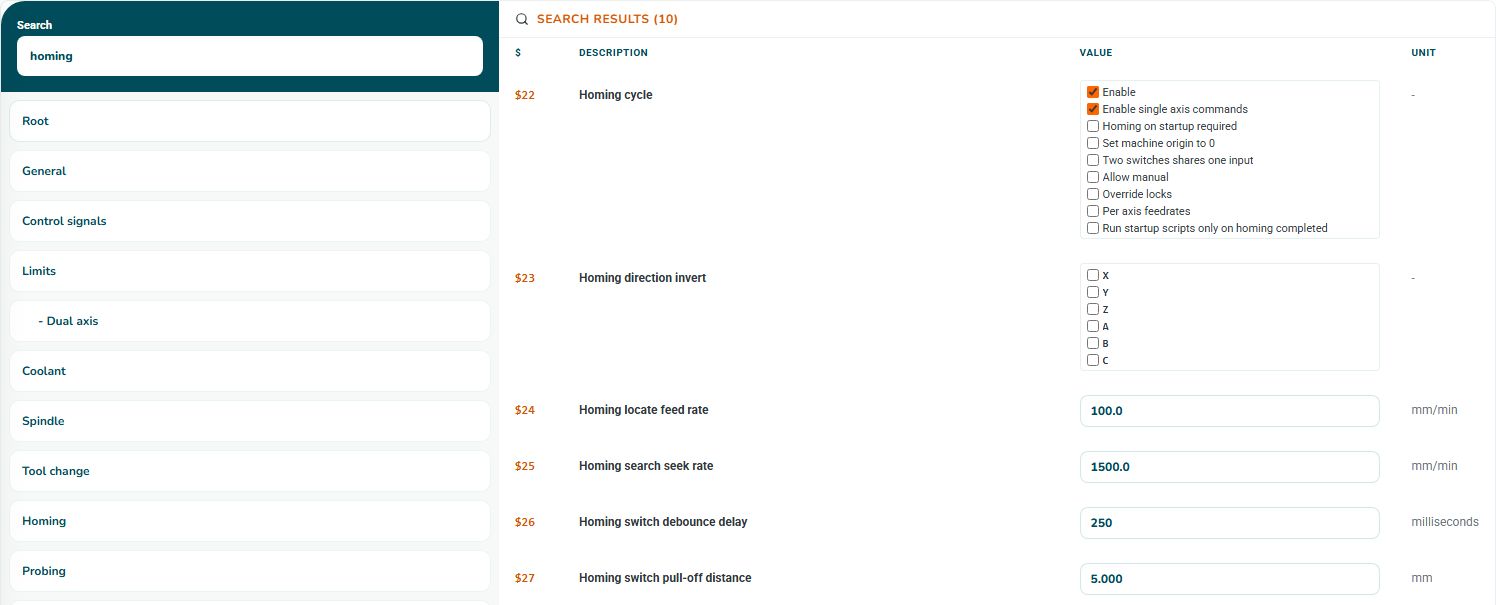
- Use Search to find a setting by its number or name. For example, enter 100 or homing.
- Search looks across the loaded settings, not just the selected category. It also checks descriptions and current values.
- Clear the search, or select a category, to return to category browsing.
|
 |
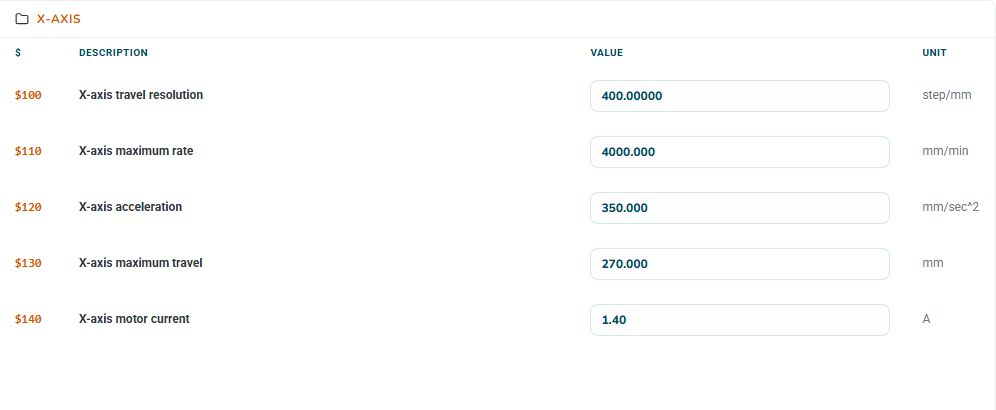
- $ identifies the controller parameter, such as $100.
- Description names the parameter and shows further help where supplied by the firmware.
- Value is the editable value. Depending on the parameter, this is a number, text field, dropdown, switch or group of checkboxes.
- Unit tells you how to interpret the value, for example mm/min or step/mm.
- Read the description and unit, and record the original value before editing.
|
 |
¶ Understanding individual grblHAL settings
| Instructions |
Preview |
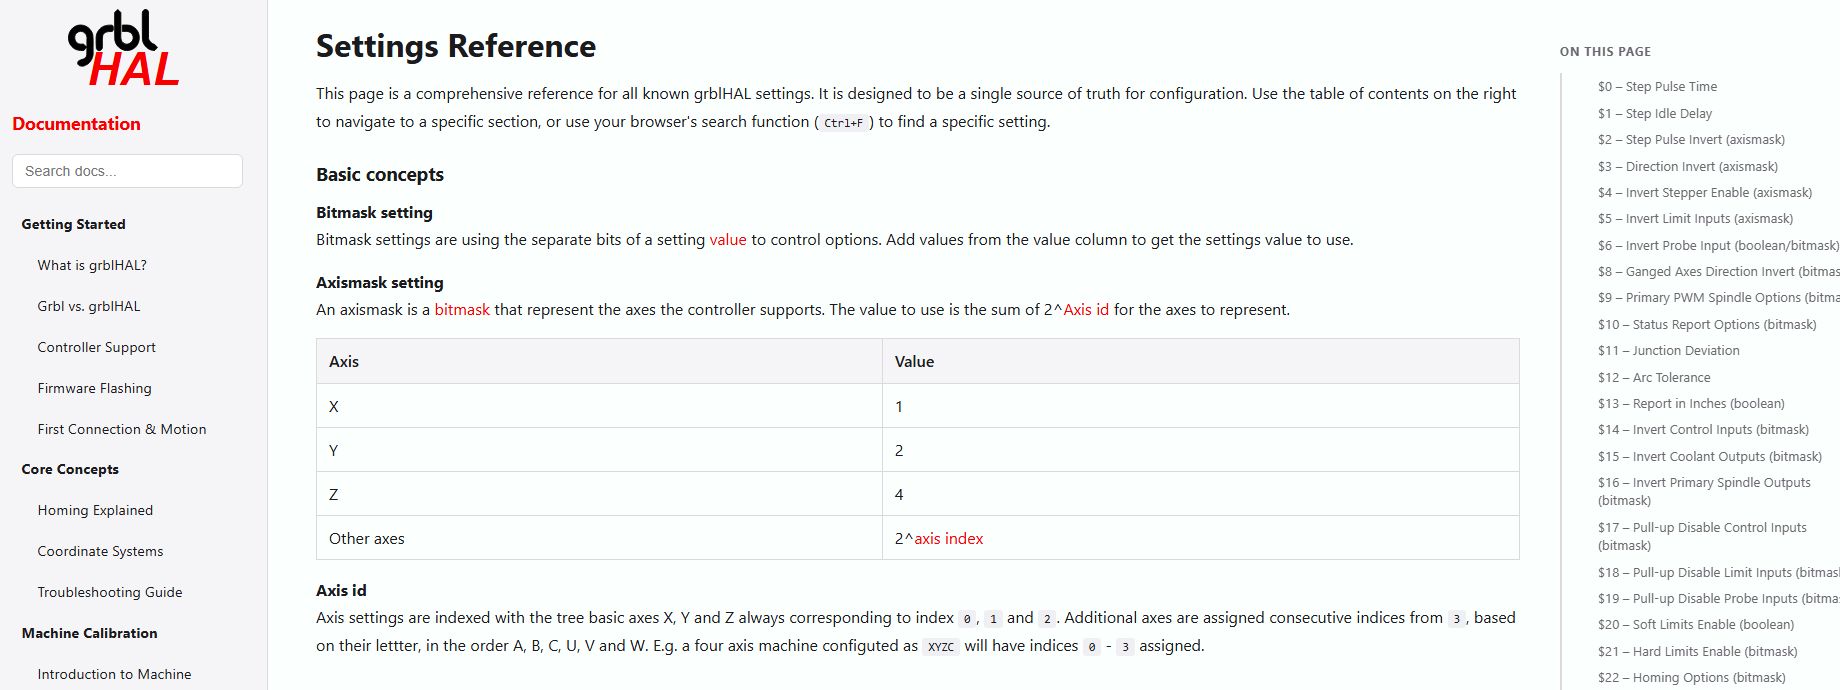
- For explanations of individual controller parameters, use the grblHAL Settings Reference.
- Find the matching $ number using the page's contents list or your browser's Ctrl+F search.
- The reference explains parameter behaviour, units and bitmask options. A bitmask combines several enabled options into one numeric value; Ooznest Control presents supported options as labelled checkboxes.
- The reference covers more hardware and firmware combinations than your machine. Do not copy another configuration's values or enable an option merely because it appears in the reference.
|
 |
| Instructions |
Preview |
- Edit only the intended parameters. Changed rows show Save?; button and category badges indicate pending edits.
- Click Save to review the current and proposed values.
- Choose Save Settings to write them, or Cancel to keep editing without writing.
|
 |
Ooznest Control sends one setting at a time and waits for the controller's reply. The result distinguishes accepted, rejected, unconfirmed and not sent values. Rejected and unsent edits remain pending.
A timeout or disconnect stops the remaining writes. An unconfirmed value may already have reached the controller; reconnect and verify before retrying. After acknowledged writes, the application rereads the values. Check them and investigate any errors in Console.
¶ Discard edits and refresh
Refresh reloads controller values. With pending edits, choose Discard and Refresh to discard them or Cancel to keep editing. Refresh does not save edits first.
After changing networking mode or Wi-Fi SSID/password, disconnect USB and switch off controller power completely. Turn the controller back on, then reconnect. A soft reset is not sufficient for these networking changes.
¶ 3. Back up and restore controller settings
| Instructions |
Preview |
- Backup downloads a timestamped JSON file containing the loaded controller settings and available firmware, board and hostname information.
- Unsaved edits are not included. If warned, back up the last loaded values or cancel. Refresh first if values may have changed elsewhere.
- Keep the file private and identify it by machine and date. It can contain networking passwords.
|
 |
- Click Restore and select the JSON backup. This opens a review; it does not write immediately.
- Check the backup identity, current/proposed values and skipped settings. Unknown IDs and invalid values are skipped. A firmware/board mismatch warning needs investigation; missing identity is not proof of compatibility.
- On the correct, safely stopped machine, choose Restore Settings to write, or Cancel to leave it unchanged.
- Check the accepted, rejected, unconfirmed and unsent results. Restore is not all-or-nothing: earlier accepted values remain applied if a later write fails.
- Verify the resulting values. After timeout/disconnection, reconnect and reread before deciding whether to retry.
The controller backup does not include Ooznest Control's locally stored gamepad mappings, probe preferences or application-local macros. Keep those separately when moving to another computer or browser.
| Instructions |
Preview |
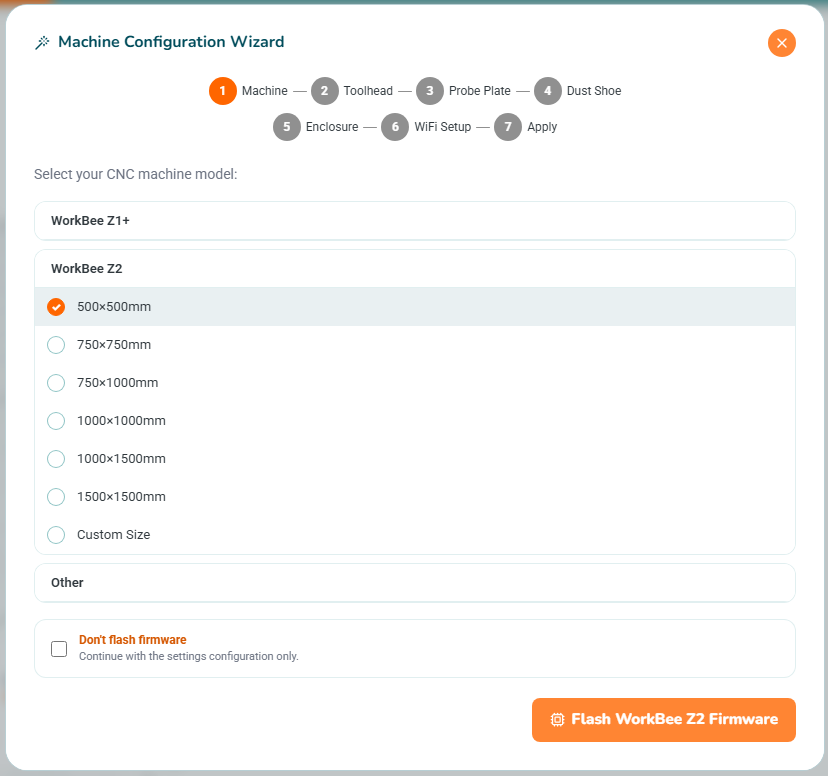
- Wizard reopens the guided machine setup.
- Choose the actual machine model and cutting area, then complete the toolhead, probe, dust shoe, enclosure, networking and review steps.
- The first step also provides the firmware-flashing route. Don't flash firmware continues with settings configuration only; use it only when the installed firmware is already appropriate.
- Applying the wizard writes the selected configuration and resets the controller. It can replace existing custom settings, so take a backup first.
- Follow First Connection and Setup for the complete step-by-step workflow.
|
 |
| Instructions |
Preview |
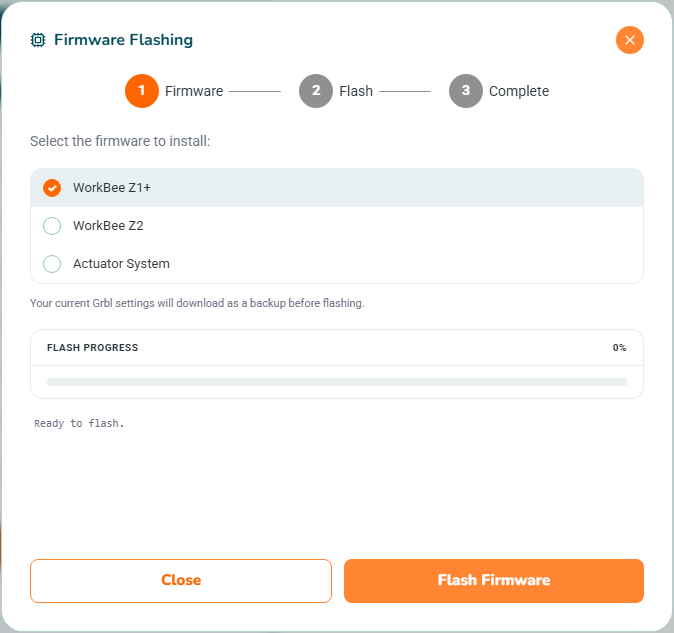
- Firmware opens the controller firmware-flashing tool. It updates the software running on the Motion Control Core, not the Ooznest Control application.
- Use a USB connection and choose the firmware for your actual machine.
- Click Flash Firmware only when you are ready to program the controller. Follow the connection and programming-port prompts; the programming port can differ from the normal controller port.
- Keep USB and controller power connected throughout flashing. Follow the progress and log until completion, then reconnect and verify the machine configuration.
- The tool attempts a settings backup before a manual flash when connected settings are available. Keep your own verified backup rather than relying on that alone.
- If an update notification appears, read its release information before choosing to update. Do not interrupt a job to flash firmware.
|
 |
| Instructions |
Preview |
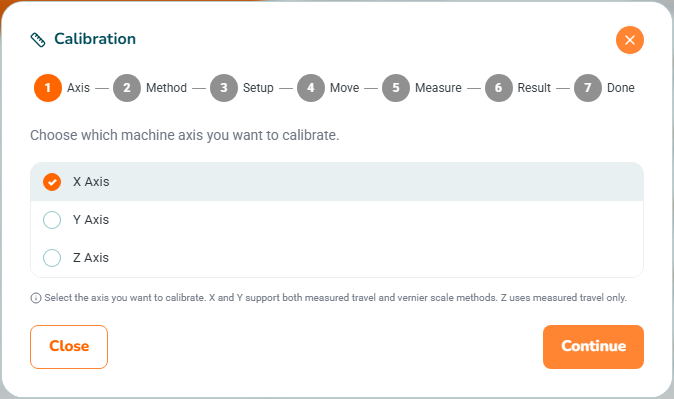
- Calibration opens the axis-calibration wizard.
- Select X, Y or Z. X and Y offer measured-travel and vernier-scale methods; Z uses measured travel.
- The wizard guides the setup, movement or test cut, measurement and calculated steps-per-millimetre correction.
- Continuing through the procedure can move the machine or generate a test cut. Prepare the machine and measuring equipment before reaching those steps.
- Use the Axis Calibration guide for the full procedure. Apply a correction only from a reliable physical measurement.
|
 |
A gamepad can jog the machine and trigger assigned actions. Check its mappings before use, keep the travel area clear, and start with the smallest increment. Feed hold is not an emergency stop.
| Instructions |
Preview |
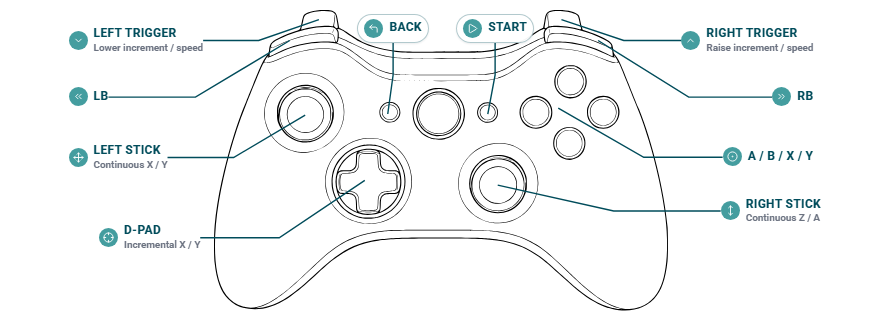
- Gamepad opens the control diagram and button mappings. Connect a compatible gamepad to the computer; if it is not detected, press a button to make it visible to the browser or app.
- Controls start disabled. Select Enable gamepad control for this connection, click Apply, and confirm the safety prompt. Enabling is session-only: disconnecting the machine or gamepad disables control again.
- Gamepad movement is paused while its settings window is open or the application loses focus. Release all sticks and buttons before resuming.
- Left stick: continuous X/Y jogging. Return the stick to centre to stop jogging.
- Right stick: vertical movement jogs Z; horizontal movement jogs A when that axis is available.
- D-pad: one incremental X/Y move per press: up Y+, down Y-, left X-, right X+.
- Left/right triggers: reduce/increase the increment and stick-speed scale. Choices are 0.1, 1, 5 and 10 mm, corresponding to 1%, 10%, 50% and 100% stick-speed scales.
- A persistent indicator shows enabled/disabled state, increment and stick scale. Actual stick speed also depends on deflection and maximum axis rates; the sidebar's Slow setting is not a gamepad speed limit.
|
 |
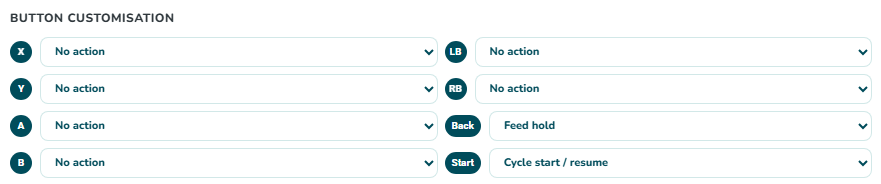
- Assign actions to X, Y, A, B, LB, RB, Back and Start using their dropdowns. No action leaves a button unassigned.
- Set X zero, Set Y zero, Set Z zero and Set X/Y/Z zero change the selected work coordinates without moving the machine.
- Home all axes, Go to XY zero and Go to Z zero cause machine movement.
- Set G28/G30 stores the current machine position as a return location. Go to G28/G30 moves to the saved location; check the destination and travel path first.
- Cycle start / resume sends the controller's start/resume command. Feed hold requests a controlled hold.
- Apply saves the proposed mappings. Enabling control or assigning a new non-empty action requires confirmation. Until Apply is confirmed, the saved mappings remain unchanged.
- Cancel, Close, Escape or clicking outside the window discards uncommitted edits. Gamepad actions remain paused while editing.
|
 |
| Instructions |
Preview |
- The installed desktop application checks for updates on startup and downloads an available update. This is separate from controller firmware flashing.
- Console shows [Update] messages for availability, download progress and failures. Keep the exact message if an update fails.
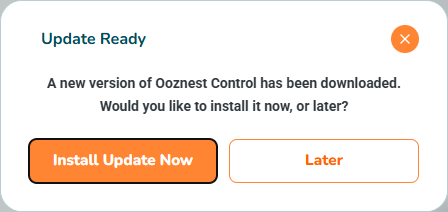
- When the download completes, Update Ready offers Install Update Now or Later.
- Install Update Now quits the application and starts the update installer. Choose it only when the machine is safely stopped and no job needs the connection.
- Later leaves the current application running.
|
 |
Probe plate dimensions and probing preferences are configured under Probe > Probe Configuration, not in the controller backup. See Probing.
Surfacing, Spoilboard Grid and Bowl Cutter have their own operation settings. Use those guides rather than changing controller parameters to match a screenshot.